How to Properly Remove and Replace Engine Components: A Step-by-Step Guide
Removing and replacing engine components can seem like a daunting task, especially for those who lack experience or knowledge in automotive repair. However, with the right guidance and systematic approach, this process can be successfully managed even by those new to engine rebuilding. In this blog post, we will walk you through the proper steps to effectively remove and replace engine components, ensuring a smooth experience and optimal results.
Step 1: Preparation
Before diving into the task at hand, preparation is key. Gather the necessary tools and equipment, including wrenches, ratchets, screwdrivers, and engine hoists. It’s also beneficial to have containers for organizing small parts and fasteners. Using small boxes or cans to store fasteners in groups according to their function will prevent confusion later on.
Step 2: Engine Removal
Removing the engine is often the first major step. Here’s how to do it safely:
- Disconnect Power Sources: Start by disconnecting the battery to prevent any electrical mishaps.
- Remove External Hardware: While the engine is still secured (on the engine hook), begin removing external components such as the carburetor, distributor, and water pump. This step simplifies the process before the engine is fully detached.
- Mark Connections: As you disconnect parts, label wires, hoses, and lines to make reassembly easier. For example, marking the distributor with a scribe mark ensures it can be reinstalled in the correct position.
- Detach the Engine: Carefully unbolt the engine mounts and other mounting hardware that secures the engine within the vehicle. Use an engine hoist to lift the engine out of the compartment.
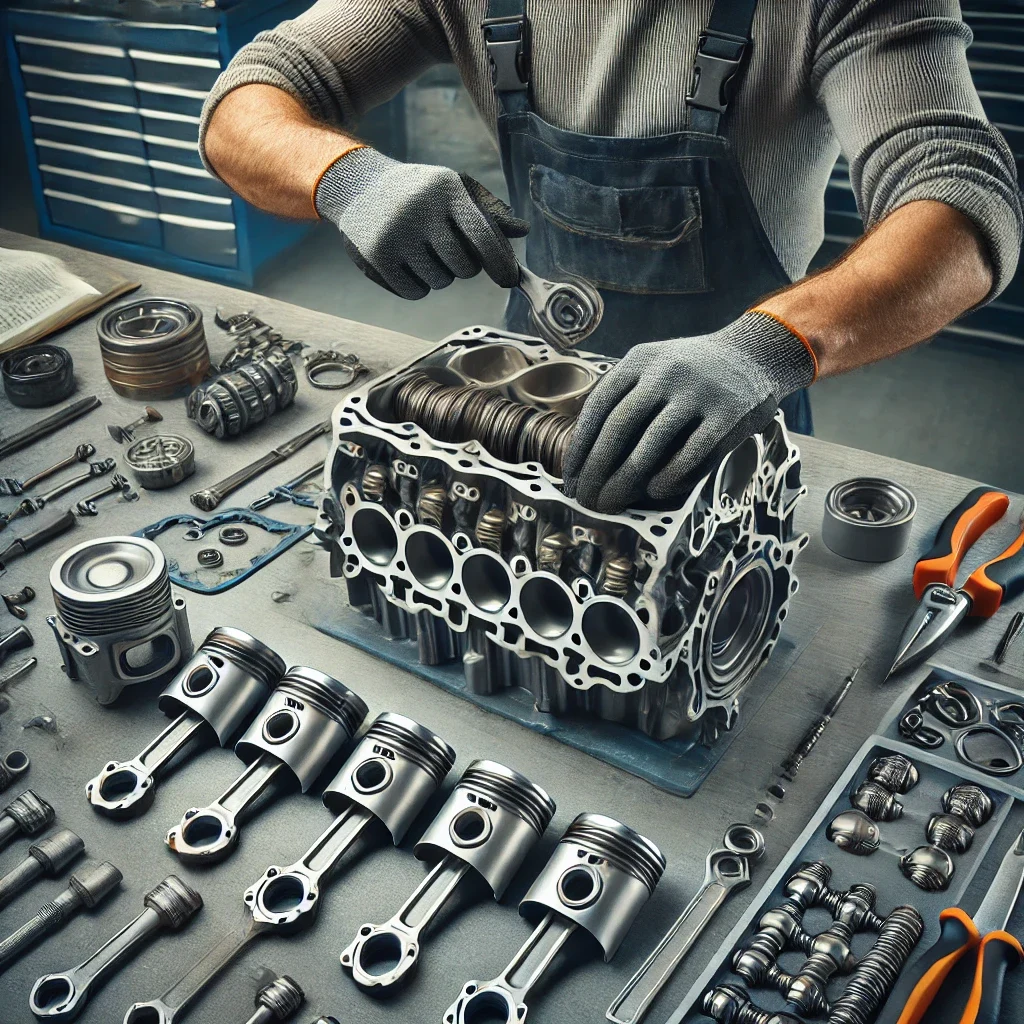
Step 3: Teardown and Inspection
With the engine removed, it’s time to inspect the components:
- Disassemble the Engine: Begin with a systematic teardown. Remove the cylinder heads, oil pan, and other major components.
- Inspect for Wear: As you remove parts, closely inspect them for wear, damage, or any signs of failure. This will inform your decisions on which components need replacement or reconditioning.
- Document Findings: Take notes or photos during the inspection process. Documenting your findings will help in the reassembly phase.
Step 4: Replacement of Components
Once you have identified any needed replacements, the next step is to install new or reconditioned parts.
- Prepare New Components: Ensure that new parts are clean, and check for fitment. Consult the vehicle’s service manual or parts catalog for specific information regarding the components.
- Reattach Components: Begin assembling the engine back together, starting with the short block. Follow the reverse order of disassembly, ensuring that you torque each bolt to the specifications provided by the manufacturer.
- Reconnect External Components: Once the engine is reassembled, reconnect external components such as the water pump, distributor, and carburetor. Be cautious to reconnect everything exactly as it was marked during disassembly.
Step 5: Engine Installation
Reinstalling the engine is the final step of this process:
- Lift Engine Back into Position: Use the engine hoist to carefully lift the engine back into the engine compartment.
- Secure Engine Mounts: Tighten the engine mounts to secure the engine in place.
- Reconnect Power Sources: Finally, reconnect the battery and ensure all components are attached properly, checking for any leaks or loose connections.
Conclusion
Removing and replacing engine components may appear overwhelming initially, but it can be a manageable task with careful planning and execution. By following this step-by-step guide, you can ensure a successful engine rebuild or maintenance process. Remember, attention to detail, organization, and safety are paramount to achieving the best results. With practice and patience, you’ll gain confidence and expertise that will serve you well in all your automotive endeavors. Happy rebuilding!